Embark on the journey of transforming your bathroom with the comprehensive guide on How to Tile a Bathroom: 12 Steps for a Stunning Transformation. Delve into the intricacies of tiling with precision and finesse, and witness your space undergo a remarkable metamorphosis.
Discover the art of tiling as we explore the essential steps required to achieve a flawless finish and elevate the aesthetic appeal of your bathroom.
Preparation for Tiling
Before diving into the tiling process, it is crucial to prepare the space properly to ensure a smooth and successful transformation. This includes accurate measurements, gathering necessary tools and materials, and prepping the surface for the tiles.
Measuring the Space
One of the first steps in preparing to tile a bathroom is measuring the space accurately. This helps determine the amount of tiles needed and ensures a precise layout. Make sure to measure both the length and width of the area to be tiled, taking into account any obstructions or corners that may affect the tile placement.
Tools and Materials
Before starting the tiling process, gather all the necessary tools and materials. This includes tile adhesive, grout, spacers, a trowel, a tile cutter, a spirit level, and safety equipment such as gloves and goggles. Having everything ready beforehand will streamline the tiling process and prevent any delays.
Surface Preparation
Properly preparing the surface before laying the tiles is essential for a long-lasting and professional finish. Start by ensuring the surface is clean, dry, and free of any debris or dust. Use a suitable primer or sealer to create a smooth and adhesive-friendly base for the tiles. Check for any cracks or uneven areas that may need to be addressed before proceeding with the tiling.
Tiling Process
When it comes to tiling a bathroom, the process of setting the tiles is crucial to achieving a stunning transformation. Properly laying out the tiles, applying adhesive correctly, and cutting tiles to fit around fixtures and corners are essential steps in ensuring a successful tiling project.
Setting the Layout for Tiles
- Start by finding the center point of the room and laying out a grid to plan the placement of tiles. This will help ensure a balanced and visually appealing layout.
- Use spacers to maintain even gaps between tiles for grouting later on.
- Dry-fit the tiles before applying adhesive to make any necessary adjustments and ensure a perfect fit.
Applying Adhesive
- Choose the right type of adhesive based on the tile material and surface you are working with.
- Apply the adhesive evenly using a trowel, making sure to cover the entire back of the tile for proper adhesion.
- Work in small sections to prevent the adhesive from drying out before laying the tiles.
Cutting Tiles to Fit
- Measure the space where the tile needs to fit and mark the cutting line using a pencil and straight edge.
- Use a tile cutter or wet saw to make precise cuts, ensuring a clean edge for a professional finish.
- For curved cuts, use a tile nipper or tile file to gradually shape the tile to fit around fixtures or corners.
Grouting and Finishing Touches
Once the tiles are in place, grouting is essential to fill the gaps between tiles and create a seamless, professional finish. Additionally, sealing the tiles helps protect them from moisture and stains, ensuring their longevity and beauty.
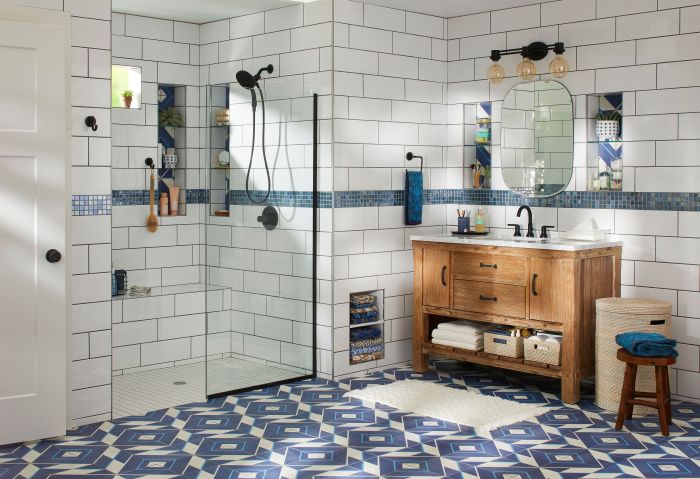
Selecting the Right Grout Color
Choosing the right grout color can significantly impact the overall look of your bathroom. Consider selecting a grout color that complements the tiles while also enhancing the aesthetic appeal of the space. For example, using a contrasting grout color can make the tiles pop, while a matching color can create a more cohesive look.
- Take samples of your tiles to the store to compare with grout colors.
- Consider the size of the tiles and spacing when selecting a grout color.
- Test a small area first to see how the grout color looks once it dries.
Cleaning and Maintenance Tips
Proper maintenance is key to preserving the beauty of your tiled surfaces over time. Regular cleaning and care can prevent grime buildup and keep your bathroom looking fresh and new.
- Use a mild detergent or specially formulated tile cleaner for routine cleaning.
- Avoid harsh chemicals that can damage the grout and tiles.
- Regularly reseal the tiles to maintain their waterproof properties.
Final Thoughts
Elevate your bathroom to new heights of sophistication and style by following the expert advice Artikeld in How to Tile a Bathroom: 12 Steps for a Stunning Transformation. With these invaluable insights, you can embark on your tiling journey with confidence and precision, ensuring a stunning outcome that will leave you in awe.